
Headlight and Fog Lamp Installation Guide: Ensuring Long-Term Us
Hello, this is SUPAREE
If you're customizing your lights, you surely want to use them as long as possible without any issues. Following our previous article on HIDs, this time we will guide you on how to extend the lifespan of your LED bulbs. If you have already installed LED bulbs in your vehicle, or are considering doing so, please take this opportunity to check out our advice.
Table of Contents
- Key Points of Installation
-
Achieving Better Light Distribution – Angle Adjustment
- Orientation of H4 Chips
-
Preventing Non-Illumination due to Rust – Orientation of Couplers
- Single Type
- H4 Hi/Lo Switch Type
- Waterproofing Fog Lamps
- Summary
Installation Key Points
The basic process involves simply replacing the bulbs, which allows for easy installation. However, unlike halogen bulbs that emit light 360 degrees from a single point of illumination, LED lighting has a different characteristic. To achieve optimal light distribution, it may be necessary to adjust the angle of the LED chips.
Achieving Better Light Distribution – Angle Adjustment
In many vehicles, there are usually no issues if the product is installed as it is shipped. However, in vehicles with a Hi/Lo switchable shading plate inside the projector or in some fog lamp units, not adjusting the angle may result in a lack of spread in the illumination range or low light intensity. In such cases, please adjust the angle according to the instruction manual of each product.
Orientation of H4 Chips
We often receive questions about the H4 installation resulting in the bulb being slightly tilted. This slight tilt is by design, allowing for a cut line that rises to the left, so a slight angle as shown in the photo is the correct installation. Please adjust the position so that the LED chip is vertical to the straight line at the base's bottom。

Preventing Non-Illumination Due to Rust – Orientation of Couplers
Regardless of our products, compared to HID, LEDs are much easier to install, and like the original bulbs, the installation can often be completed by merely replacing the bulb itself. Amidst this simplicity, there's a detail many may overlook: waterproofing the coupler.
Single Type

For single-type halogen bulbs, the power coupler is mostly designed to naturally face downwards when the bulb is set and locked in place.
When you switch to LED, there's a control unit in the wiring, making the setup longer than the original bulbs, leading to excess wiring. While securing this excess, many tend to focus solely on the length and secure it at the most convenient spot. However, it's important to ensure that the receiver side (LED side) coupler faces downwards and that the wiring is secured in a way that prevents water from following the wires into the connection.
Preventing Non-Illumination due to Rust – Coupler Orientation
Regardless of our product, compared to HID, LED installation is very easy and can mostly be done by simply replacing the bulbs, just like the original ones. However, there's an often overlooked aspect: waterproofing the couplers.
Single Type
For single-type halogen bulbs, the power coupler is mostly designed to naturally face downwards when the bulb is set and locked in place.
When switching to LED, the control unit is in between the wires, making the assembly longer than the original bulb, which may leave excess wiring. When securing this excess wiring, it's easy to focus only on the length and secure it wherever it fits easily. However, it's important to ensure that the coupler on the receiving side (LED side) is facing downwards and secured in a manner that prevents water from following the wiring into it.
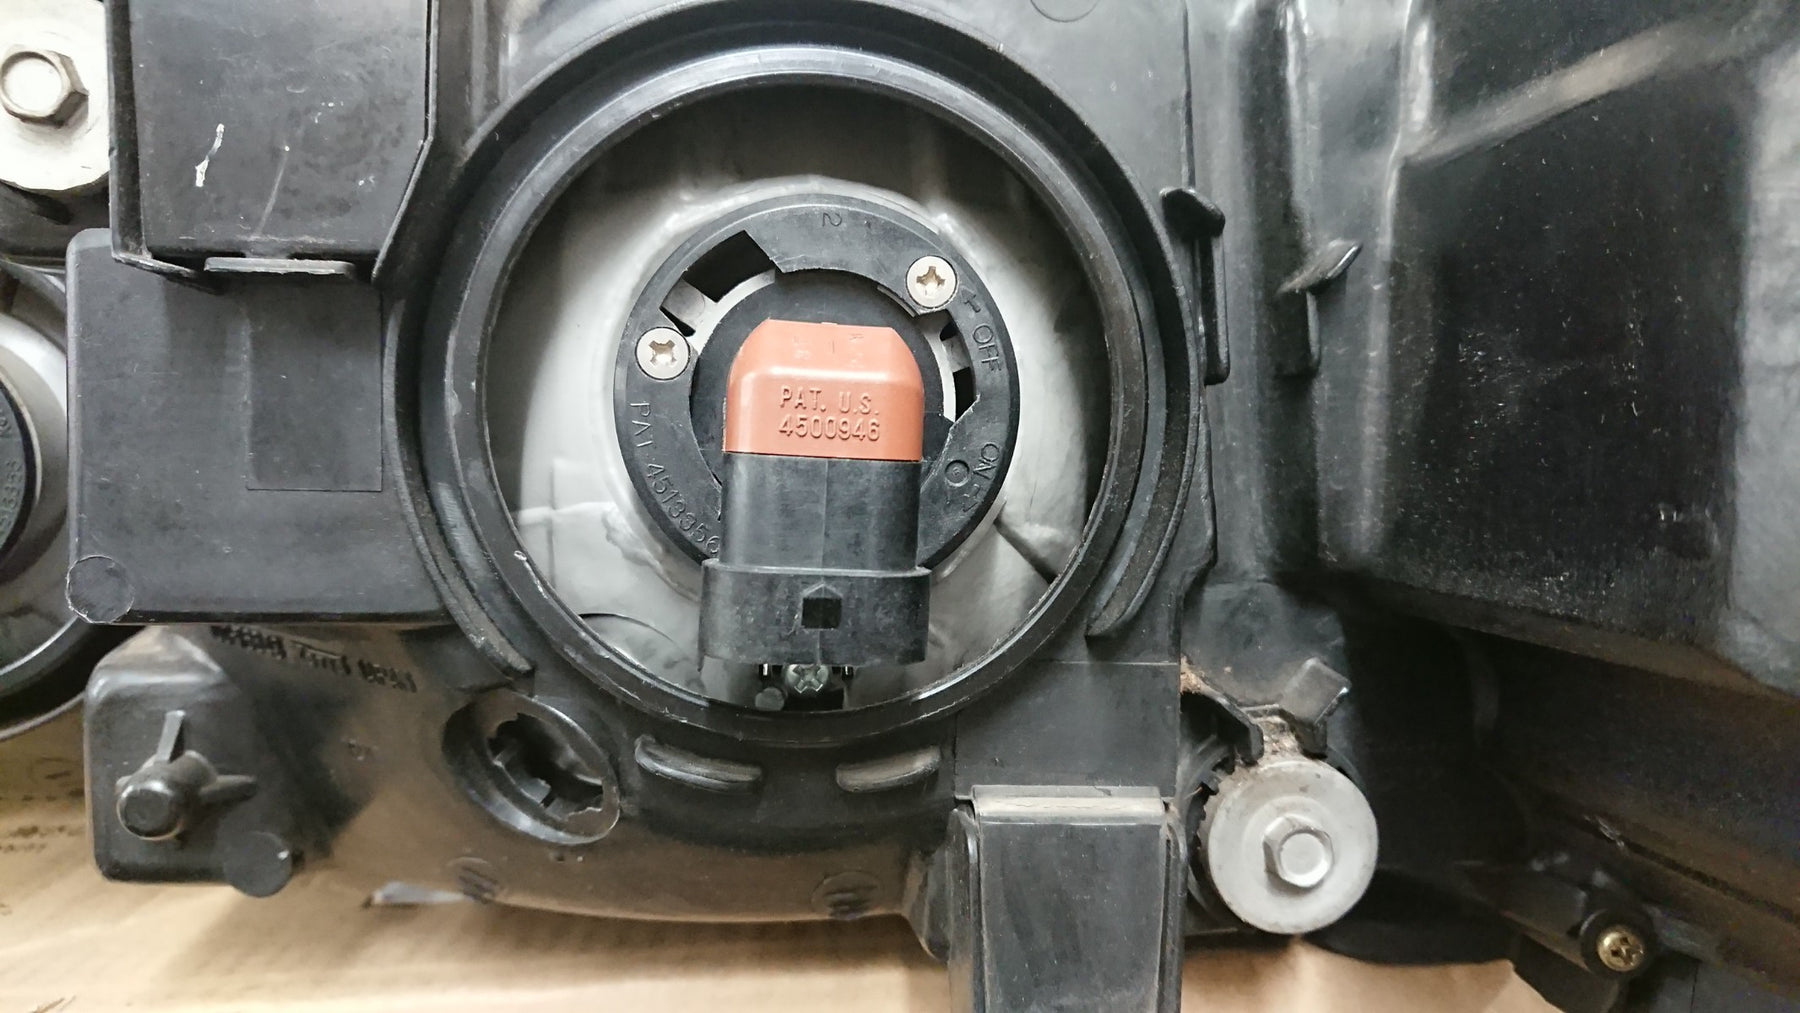
H4 Hi/Lo Switch Type
For H4 Hi/Lo switchable types, the original coupler itself is not waterproof. Therefore, many models use grease on the coupler as a waterproofing measure.
When removing the original halogen bulb, this grease tends to get everywhere. This grease is waterproof grease, different from conductive or contact grease, and can deteriorate over time and with electricity flow.
If not removed before installing the LED, this grease can degrade over time, leading to poor electrical flow and connection issues. To prevent this, first clean off the grease with parts cleaner after removing the original bulb. Once clean, connect the LED coupler and apply waterproof grease from the outside. This prevents contact failure and also provides waterproofing.
If your vehicle's H4 Hi/Lo coupler doesn't have grease and shows no signs of rust, it might be positioned in a place less likely to get wet, and the manufacturer may have decided waterproofing wasn't necessary (though it could simply be a cost-saving measure).
Waterproofing Fog Lamps
Even just replacing a bulb on a humid day can cause lens fogging, as fog lamps are more prone to it than headlights. This is because fog lamps are located lower to the ground, making them more susceptible to water splash and generally have lower waterproofing capabilities than headlights.
Additionally, waterproof gaskets can degrade, and lens cracks from stones can also lead to water ingress. Especially when switching from halogen bulbs to LEDs, which produce less heat, any water that used to evaporate due to the heat might not evaporate completely, remaining inside the unit and causing fogging.
A clogged ventilation port on the fog lens can also cause fogging, a factor that might not be immediately obvious.
We offer several solutions for preventing fog lamp fogging. For more detailed methods, please refer to the article below.
Summary
Finally, it's important to emphasize the significance of regular inspections. Although it's a hassle and easy to forget, it's crucial. Check whether water has entered by plugging and unplugging the coupler, and ensure the LED bulb's light color and intensity do not vary significantly between the left and right sides. These bulb changes can be hard to notice, so taking photos under similar conditions periodically can be helpful.
Switching to LED can enhance visibility in bad weather and significantly contribute to your vehicle's appearance with its sharp illumination. However, when switching from original to aftermarket parts, differences in power consumption, product, gasket size, and illumination mechanism compared to the original settings require attention to prevent discomfort and malfunction.
While switching to LED is easier than to HID, there may still be a need for waterproofing, rust prevention, and noise countermeasures. With just a few simple steps, you can enjoy a trouble-free use for a long time. Enjoy a clear car life without any fog.
*Please note that the installation method may vary depending on the vehicle. If it's difficult, never force it and consult a professional near you.
Leave a comment